17 February 2019
The real guide to creating a website with free hosting (2019)
Door: Sem Postma
If you search google for “How to create a free website” you will see a bunch of website builders and websites who will give you a domain like: “yourname.theirname.com” or “theirname.com/yourname”. But in this tutorial/guide I will show you the secret to creating a real website completely customizable website. The only payment you will need to do is a 0.89 dollar one year domain.
Step 1
Go to https://www.namecheap.com/domains/ and search for a domain name. I would suggest choosing an uncommon domain name. Try to find one that costs as little as possible. This is probably the best because if you’re starting out, you can always buy a more expensive domain later. If you’ve found a cheap domain it’s probably because it’s very unique and original so it’s a good thing. One thing to keep in mind though is to keep the domain name as short as possible.
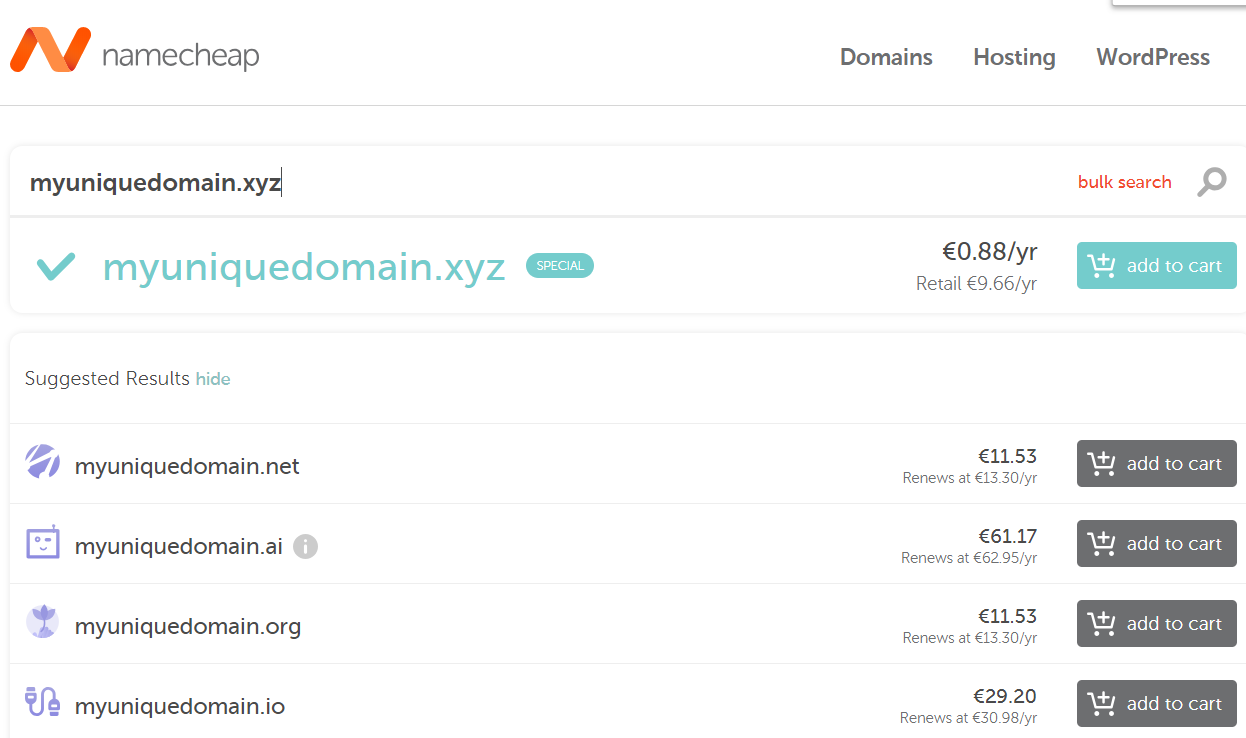
In this example I’m using namecheap but you can use any service you want. If you want to follow along I suggest you buy the domain via namecheap, they provide good pricing and a nice user interface (I’m not sponsored). For example this domain costs 0.88 euro/yr which is about a 1 USD. Click “add to cart”, create an account if you haven’t already and buy the domain.
Step 2
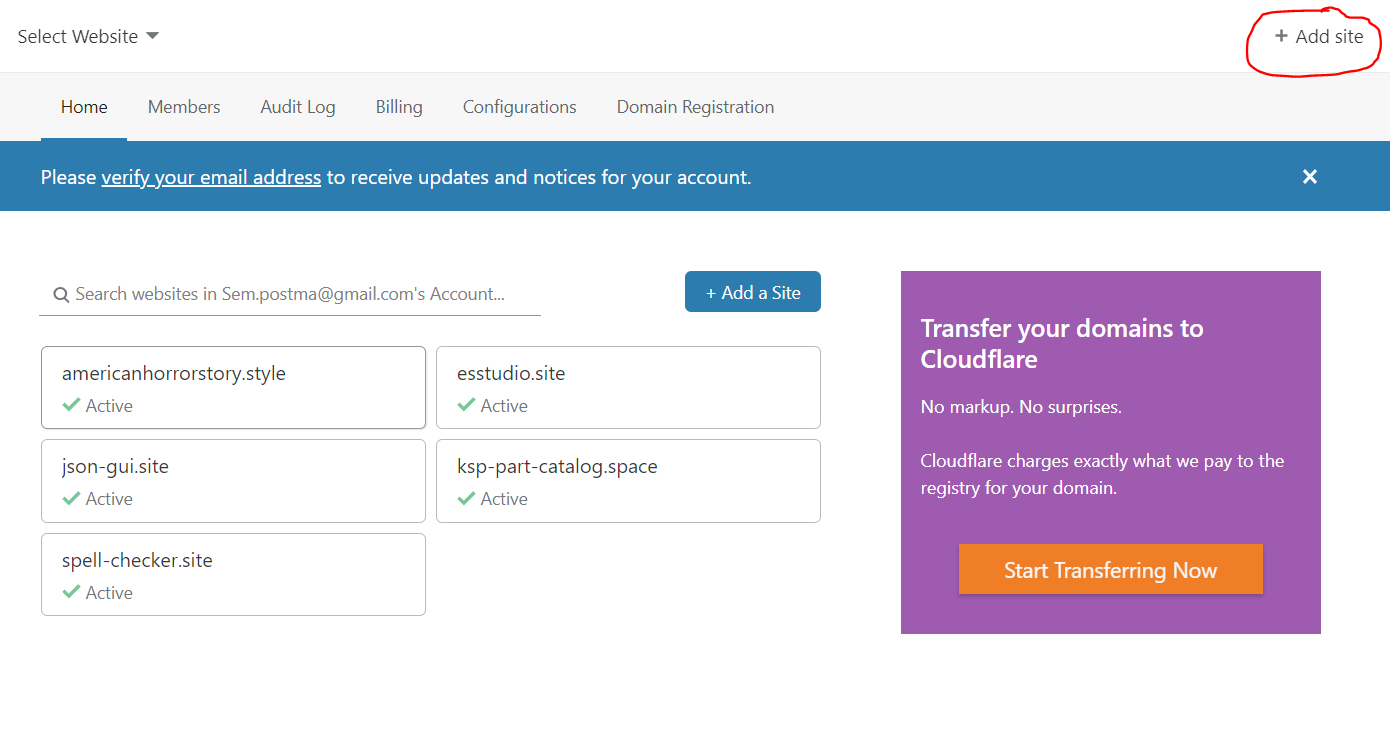
When you’re done, go to https://www.cloudflare.com/, create an account and add a website:
Cloudflare will now get your DNS records. If you are not familiar with those, it doesn’t matter, you can just click continue until you get to the following dialog:
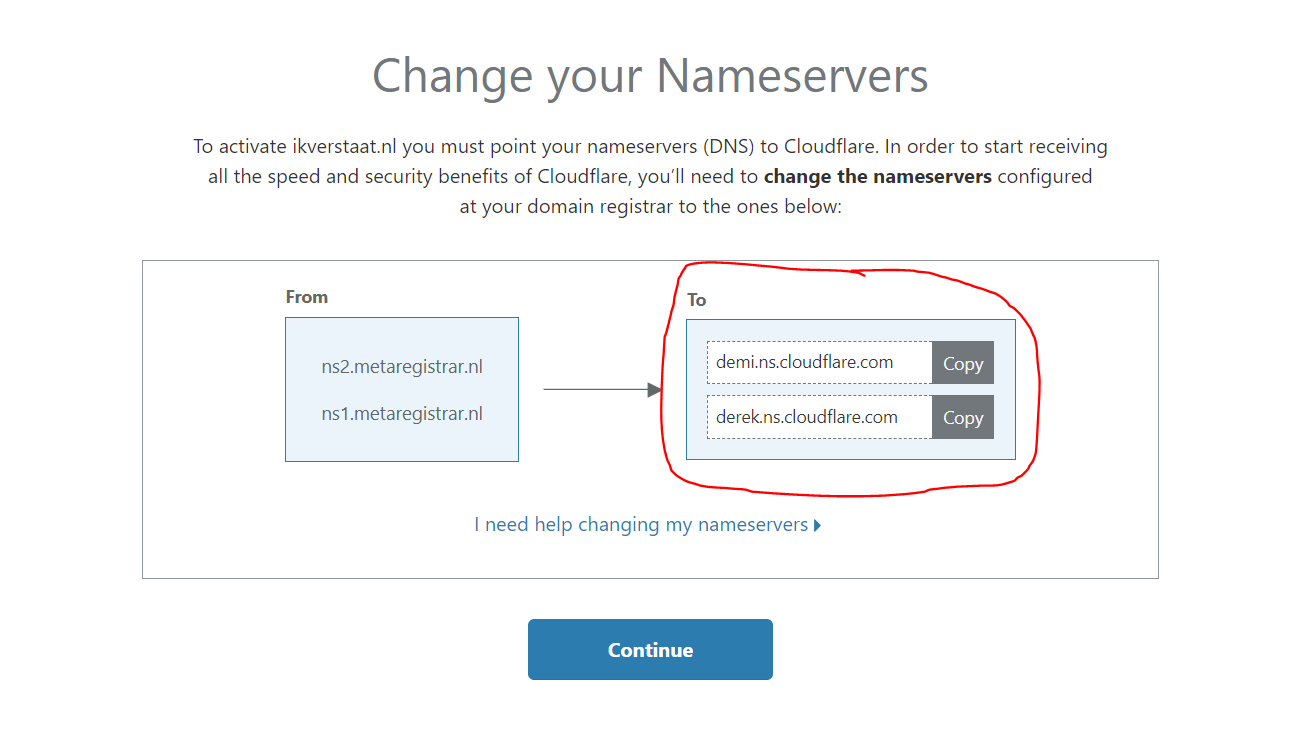
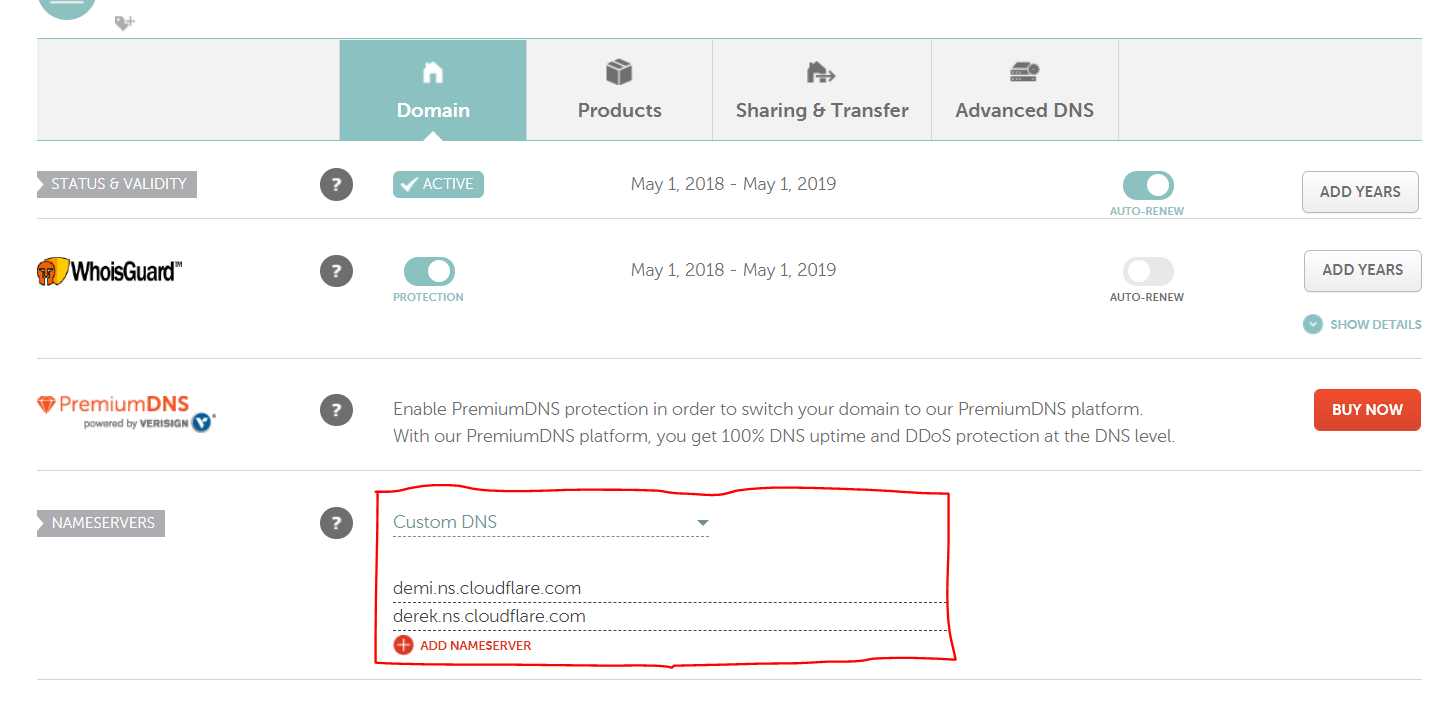
Go back to your namecheap account (or another domain name provider if you didn’t use namecheap). Go to your domain’s dashboard and change the nameserver setting to Custom DNS and copy the nameservers values to the values in the cloudflare dialog:
If you’re not using namecheap, search for the nameserver setting, there should be a similar setting. If you can’t find it, a quick google search often reveals where you can change it.
Go back to cloudflare, click “continue”, and wait until cloudflare completes your nameserver setup. This can take a (very) long time. If it’s not immediately working just give it an hour’s worth of time.
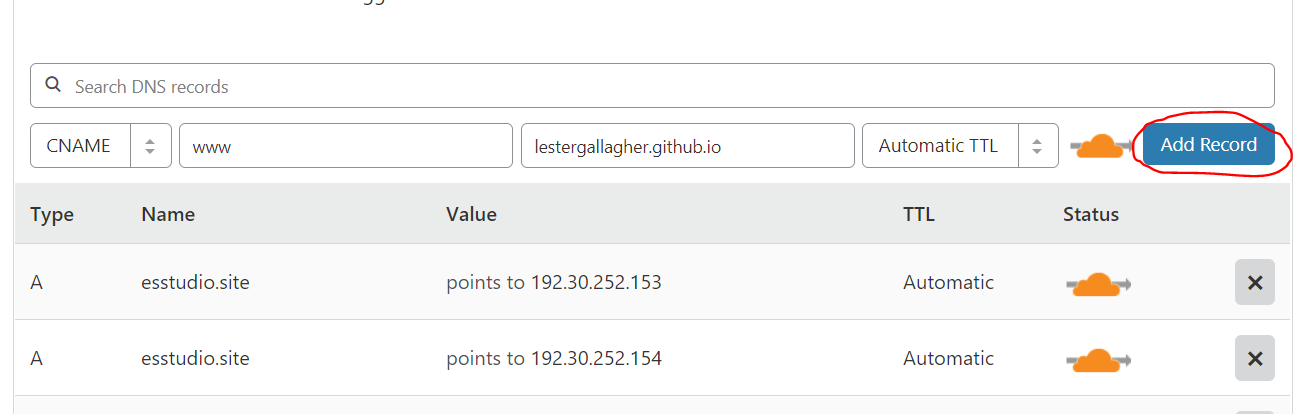
You need to add three records to your DNS table.
- Add an “A” record by clicking the dropdown in the top left in the above image and give it the name of your domain in my example it’s “esstudio.site”. Make sure you don’t include any slashes or the “https://” part of the url. In the value field, put in “192.30.252.153”.
- Add another “A” record by clicking the dropdown in the top left in the above image and give it the name of your domain in my example it’s “esstudio.site”. Make sure you don’t include any slashes or the “https://” part of the url. In the value field put in “192.30.252.154”.
- Finally, add a CNAME record with the name “www”. In the value field, put in the name of your github username plus “.github.io” If you don’t have a github account, you can do this after step 3.
For all the records keep the TTL setting at “Automatic TTL”.
Step 3
Next, go to https://github.com/, and create an account if you haven’t already. Click on the little plus icon in the top right and choose “New repository”. You can also go to your repositories and click “New”. You will see the following dialog:
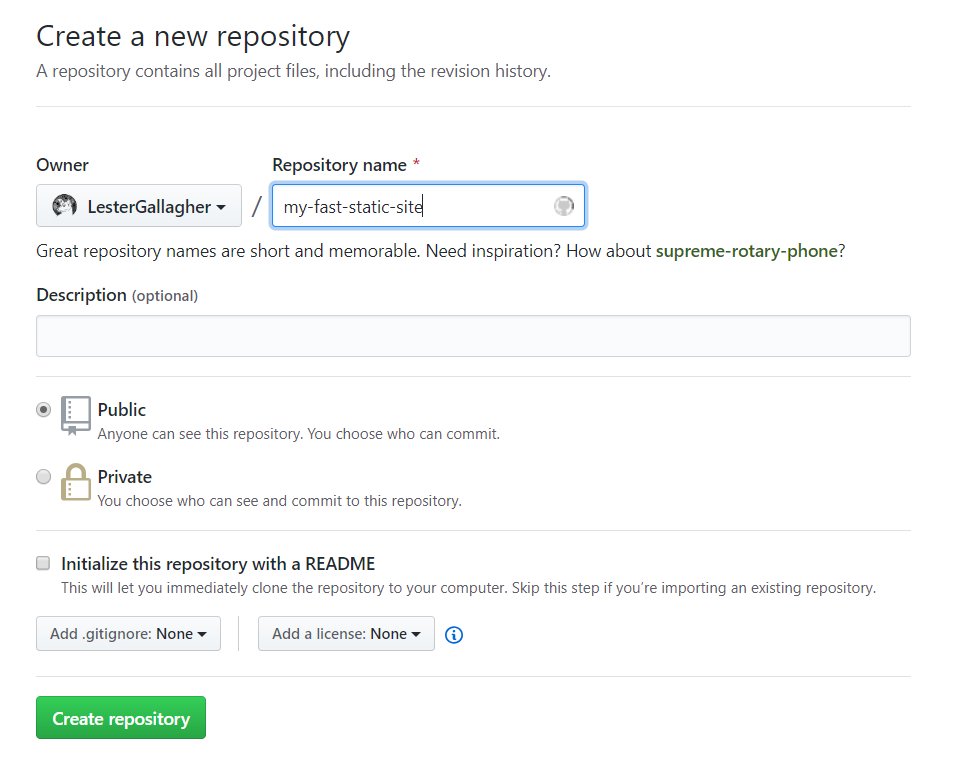
Choose a repository name and description, keep the repository public (it’s going to be a public website so it will be public anyway) and click “Create repository”.
The following page might be a bit confusing if you’re not a programmer or you’re not familiar with git(hub) but you need to click the “Create a new file” link/button.
If you know HTML you can put in the following:
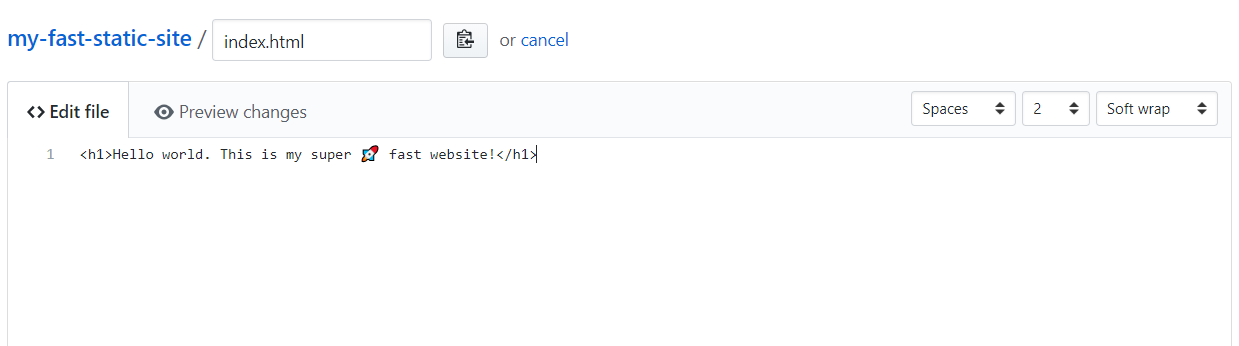
Otherwise enter the following:

The above picture shows a markdown file but that’s to only thing you need to know. If you don’t know anything about HTML or Markdown you can a website called forestry.io to edit and create pages. I’m actually using it right now to write this article.
If you’re a programmer, keep in mind that even though this is just a static website hosted on github, a lot of websites nowadays are just static web apps running react or angular which fetch data from an API. You can even use https://firebase.google.com/ for a full serverless architecture or use something like heroku to create an API. You can use forestry.io as a CMS for your github repositories. It actually commits and pushes your edits to github. You can even use jekyll which has builtin support for sass, coffeescript, markdown and does a lot more. You can even use jekyll to output data as JSON. I’ve created an RSS reader using the methods above which can be found here: https://newsfeeder.esstudio.site/.
Step 4
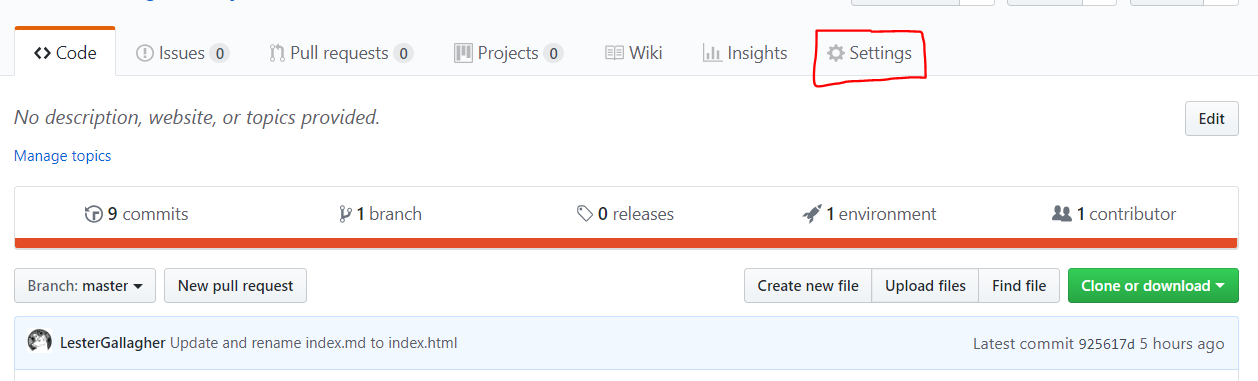
The following steps may be confusing but just follow along and copy what I’m doing. Click on the “settings” tab:
Scroll down until you see the following:
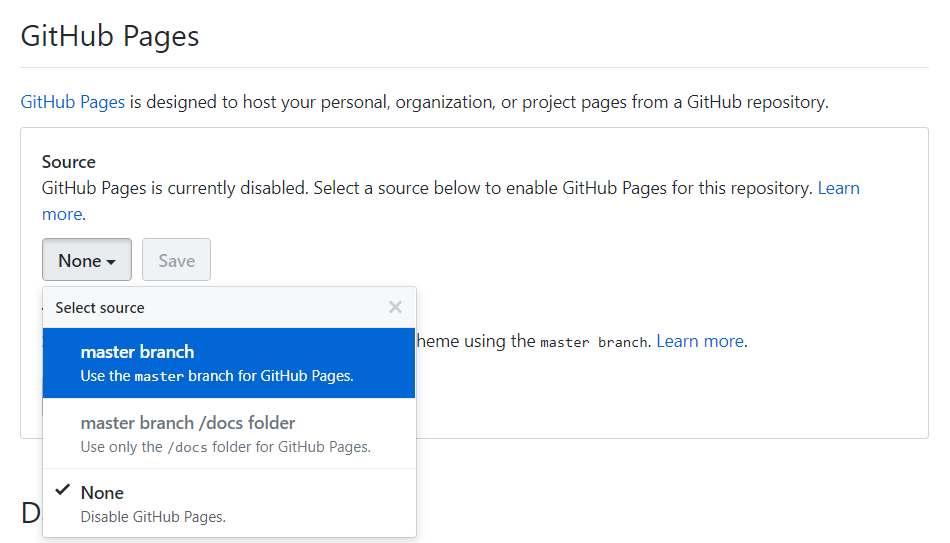
Click the github pages source dropdown and select the “master” branch.
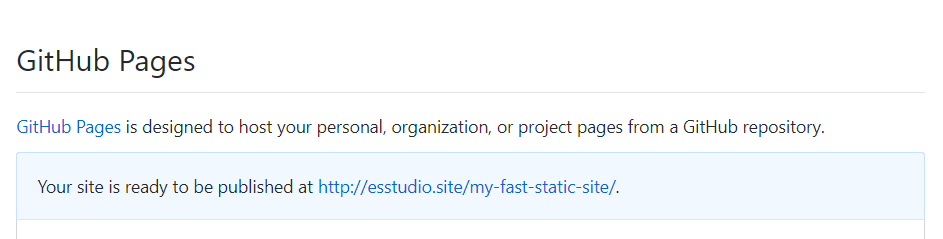
You will probably see something like this. Because we want an absolute URL (without the “/my-fast-static-site/” part we go back to the code tab and add a new file:
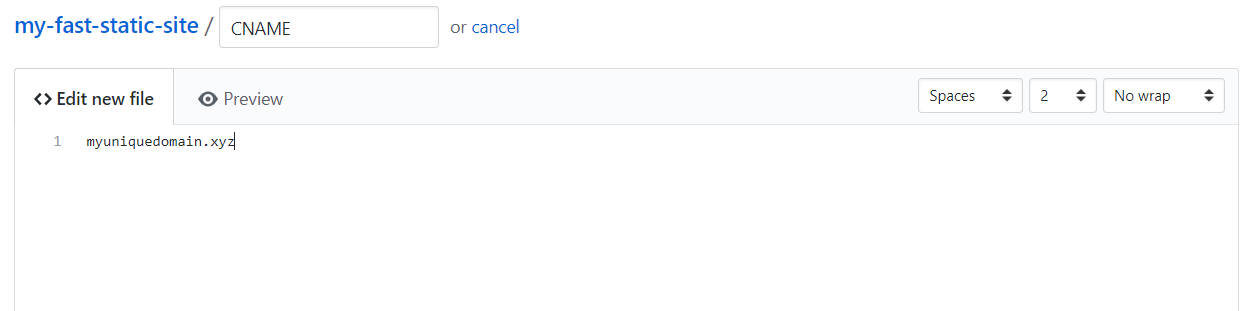
Enter the domain name you just purchased. It’s important that you don’t include any slashes or the “https://” part in the domain name. Save the file and we’re done with github.
Step 5
After completing the previous step, wait a minute and open your domain and see if it’s working. If it’s not, please leave a message in the comments.
To improve performance and enable SSL and HTTPS, go to back to cloudflare. For non-programmers, if you use HTTPS you’re users will see a little security lock next to the URL to show that the page is secure.
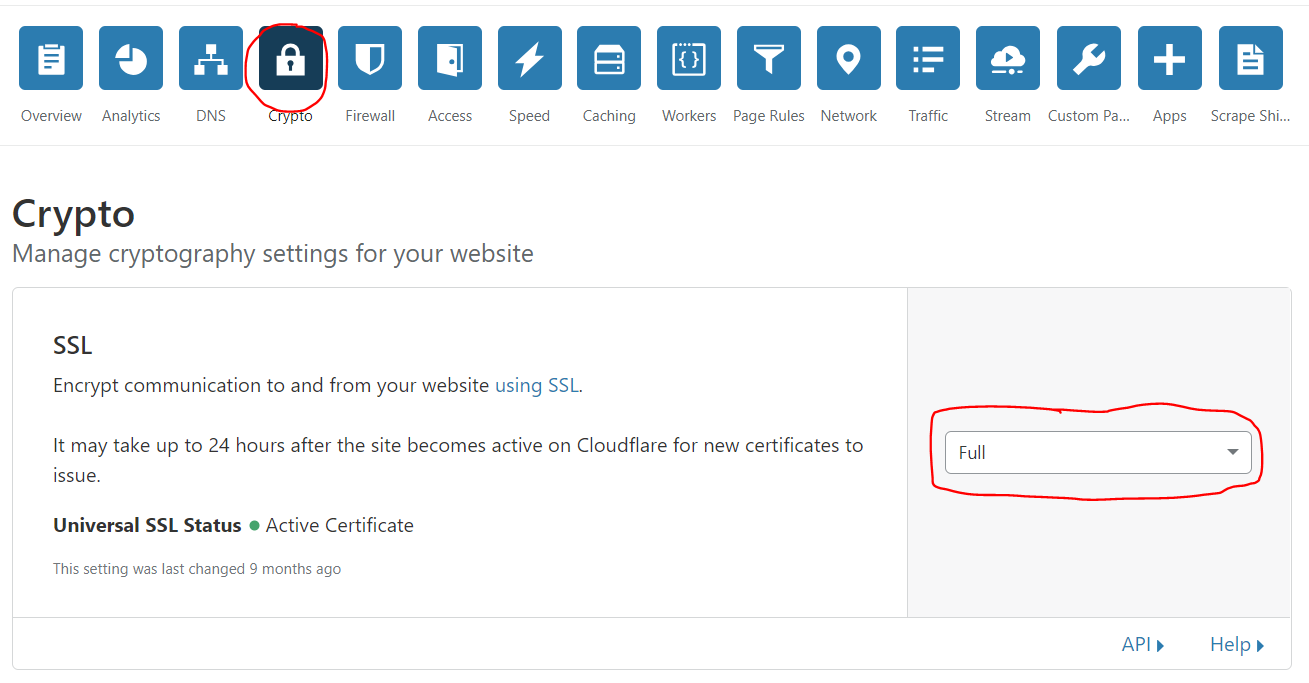
Click on the crypto icon and enable full SSL.
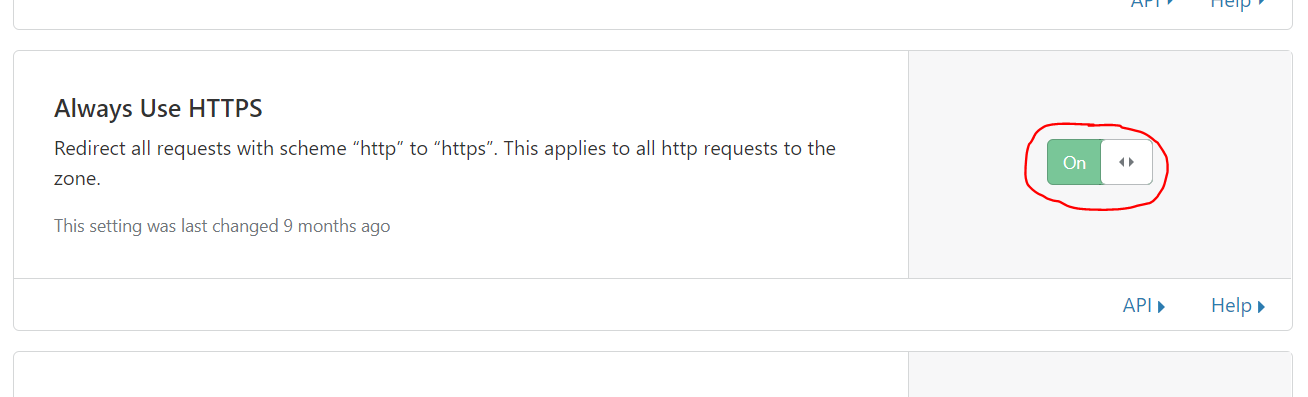
Scroll down and make sure that “Always Use HTTPS” is selected.

Click the speed icon. And enable “Auto Minify” of Javascript, CSS and HTML.
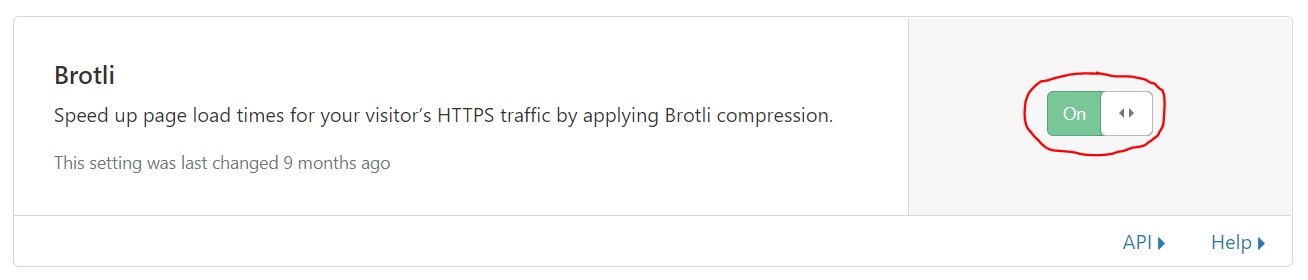
Scroll down and enable Brotli compression.
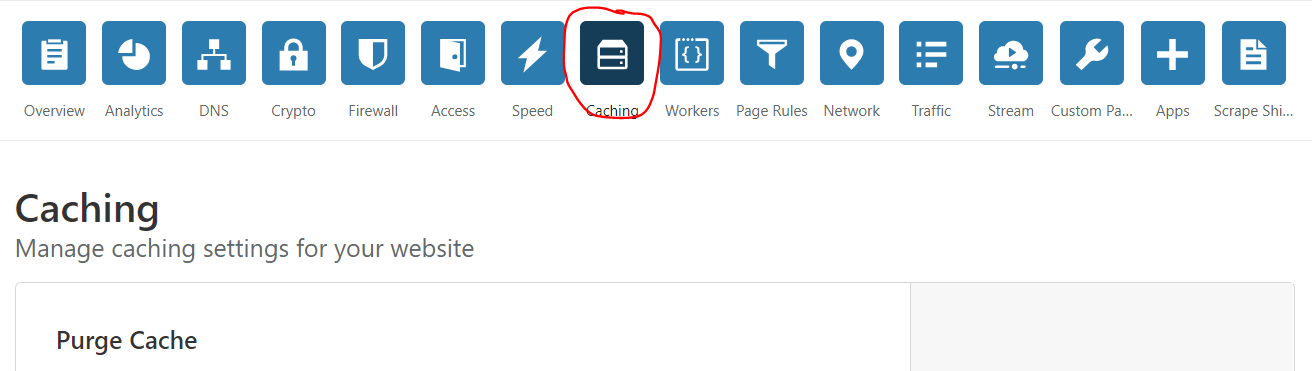
Scroll down and click the caching icon.
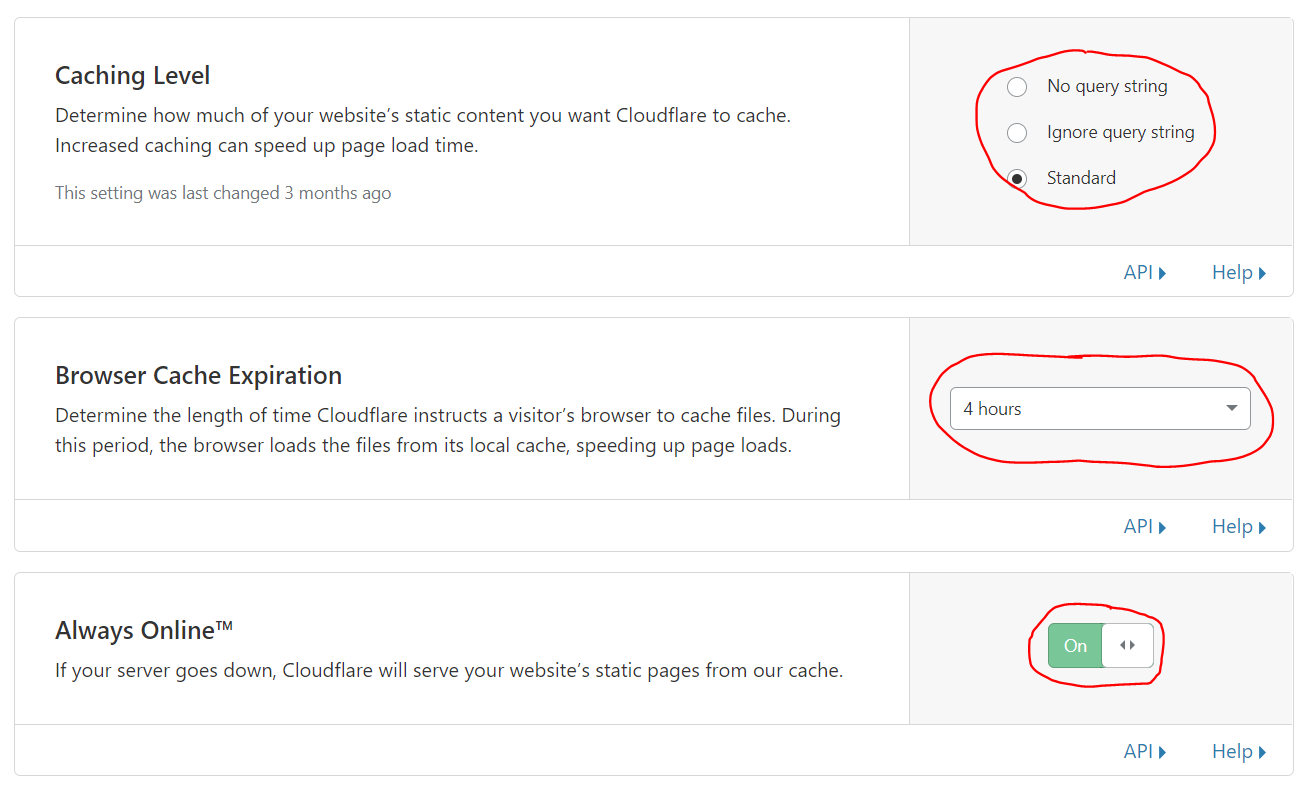
Scroll down and select the Standard caching level. Set the browser cache expiration to 4 hours and make sure that “always online” is set to “On”.
And you’re done!
To edit you’re pages I recommend forestry.io. To get started with foresty.io, click “login” and then “login with github”. Import your github repository as a jekyll project and you can start adding pages. If you want to learn more check out the documentation.
To change you’re website’s theme, you can select these themes. Click on one of the themes, for example cayman. If you scroll down, you will probably see a “usage” section. You only need to do the first instruction which looks like this in the case of the cayman theme:
Add the following to your site’s _config.yml:
theme: jekyll-theme-cayman
Note to programmers
If you’re using a javascript framework or a build tool you can use git to push you’re dist folder to the github-pages branch using the steps below. These steps are copied from: https://gist.github.com/cobyism/4730490.
Step 1
Remove the dist directory from the project’s .gitignore file (it’s ignored by default by Yeoman).
Step 2
Make sure git knows about your subtree (the sub folder with your site).
git add dist && git commit -m "Initial dist subtree commit"
Step 3
Use subtree push to send it to the gh-pages branch on GitHub.
git subtree push --prefix dist origin gh-pages
Boom. If your folder isn’t called dist, then you’ll need to change that in each of the commands above.